

Introduction to Homemade Bread
Homemade bread represents not just a culinary process, but an enriching experience that elevates the simplest of ingredients into a delicious staple. The surge in interest for baking bread at home can largely be attributed to the myriad of benefits it offers. One of the most prominent advantages is the opportunity to enjoy unparalleled flavor and freshness. Store-bought options often contain preservatives and artificial ingredients, while homemade breads can be tailored to personal taste preferences and dietary restrictions, allowing for creativity in every loaf.
Moreover, making bread at home is often more economical compared to purchasing artisanal loaves from bakeries. Ingredients such as flour, water, yeast, and salt are typically low-cost and can yield multiple loaves. This not only saves money but also fosters a sense of accomplishment amongst those who partake in this age-old practice. Many individuals are daunted by the thought of bread-making, often believing that it requires extensive skills or time commitment. However, the reality is that the process can be remarkably simple and can often be completed in a few straightforward steps.
As we delve into the world of homemade breads, it’s essential to dismantle the common myth that bread-making is solely for experienced bakers. Techniques such as no-knead bread, which utilizes a long fermentation process to develop flavor and texture without the need for vigorous kneading, and easy sourdough variants can be easily grasped by beginners. Flatbreads, often quicker and more forgiving in terms of technique, also allow for expressive customization. This guide aims to empower budding bakers to embrace the art of homemade bread by showcasing its simplicity and rewarding outcomes.
No-Knead Bread: The Easiest Recipe
No-knead bread is an incredibly approachable method for novice bakers, making it an ideal first recipe for those looking to explore homemade bread. This technique harnesses time rather than manual labor to develop the gluten necessary for a delicious loaf. By utilizing minimal ingredients and a relaxed fermentation process, even the most inexperienced cook can achieve success with this straightforward recipe.
To create your no-knead bread, you will need the following ingredients:
- 3 cups all-purpose flour
- 1 ½ teaspoons salt
- ½ teaspoon instant yeast
- 1 ½ cups warm water
Begin by combining the flour, salt, and yeast in a large mixing bowl. Gradually add the warm water, stirring until the mixture has come together into a wet, sticky dough. This method avoids kneading entirely, so stick to mixing until no dry flour remains visible.
Once mixed, cover the bowl with plastic wrap or a kitchen towel and allow it to rise at room temperature for 12 to 18 hours. This slow fermentation process allows the dough to develop flavor and structure naturally—a significant benefit of the no-knead technique.
After the resting period, you will notice that the dough has expanded and bubbled. Lightly flour your work surface and turn the dough out onto it. With floured hands, gently shape it into a ball without kneading. Place the dough seam-side down on a well-floured piece of parchment paper and cover it again. Let it rest for 30 minutes while you preheat your oven to 450°F (232°C).
Finally, transfer the dough on the parchment into a preheated Dutch oven or cast-iron pot with a lid. Bake for 30 minutes covered, then remove the lid and bake for an additional 15-20 minutes until golden brown. Allow to cool before slicing, and enjoy your fresh, homemade no-knead bread.
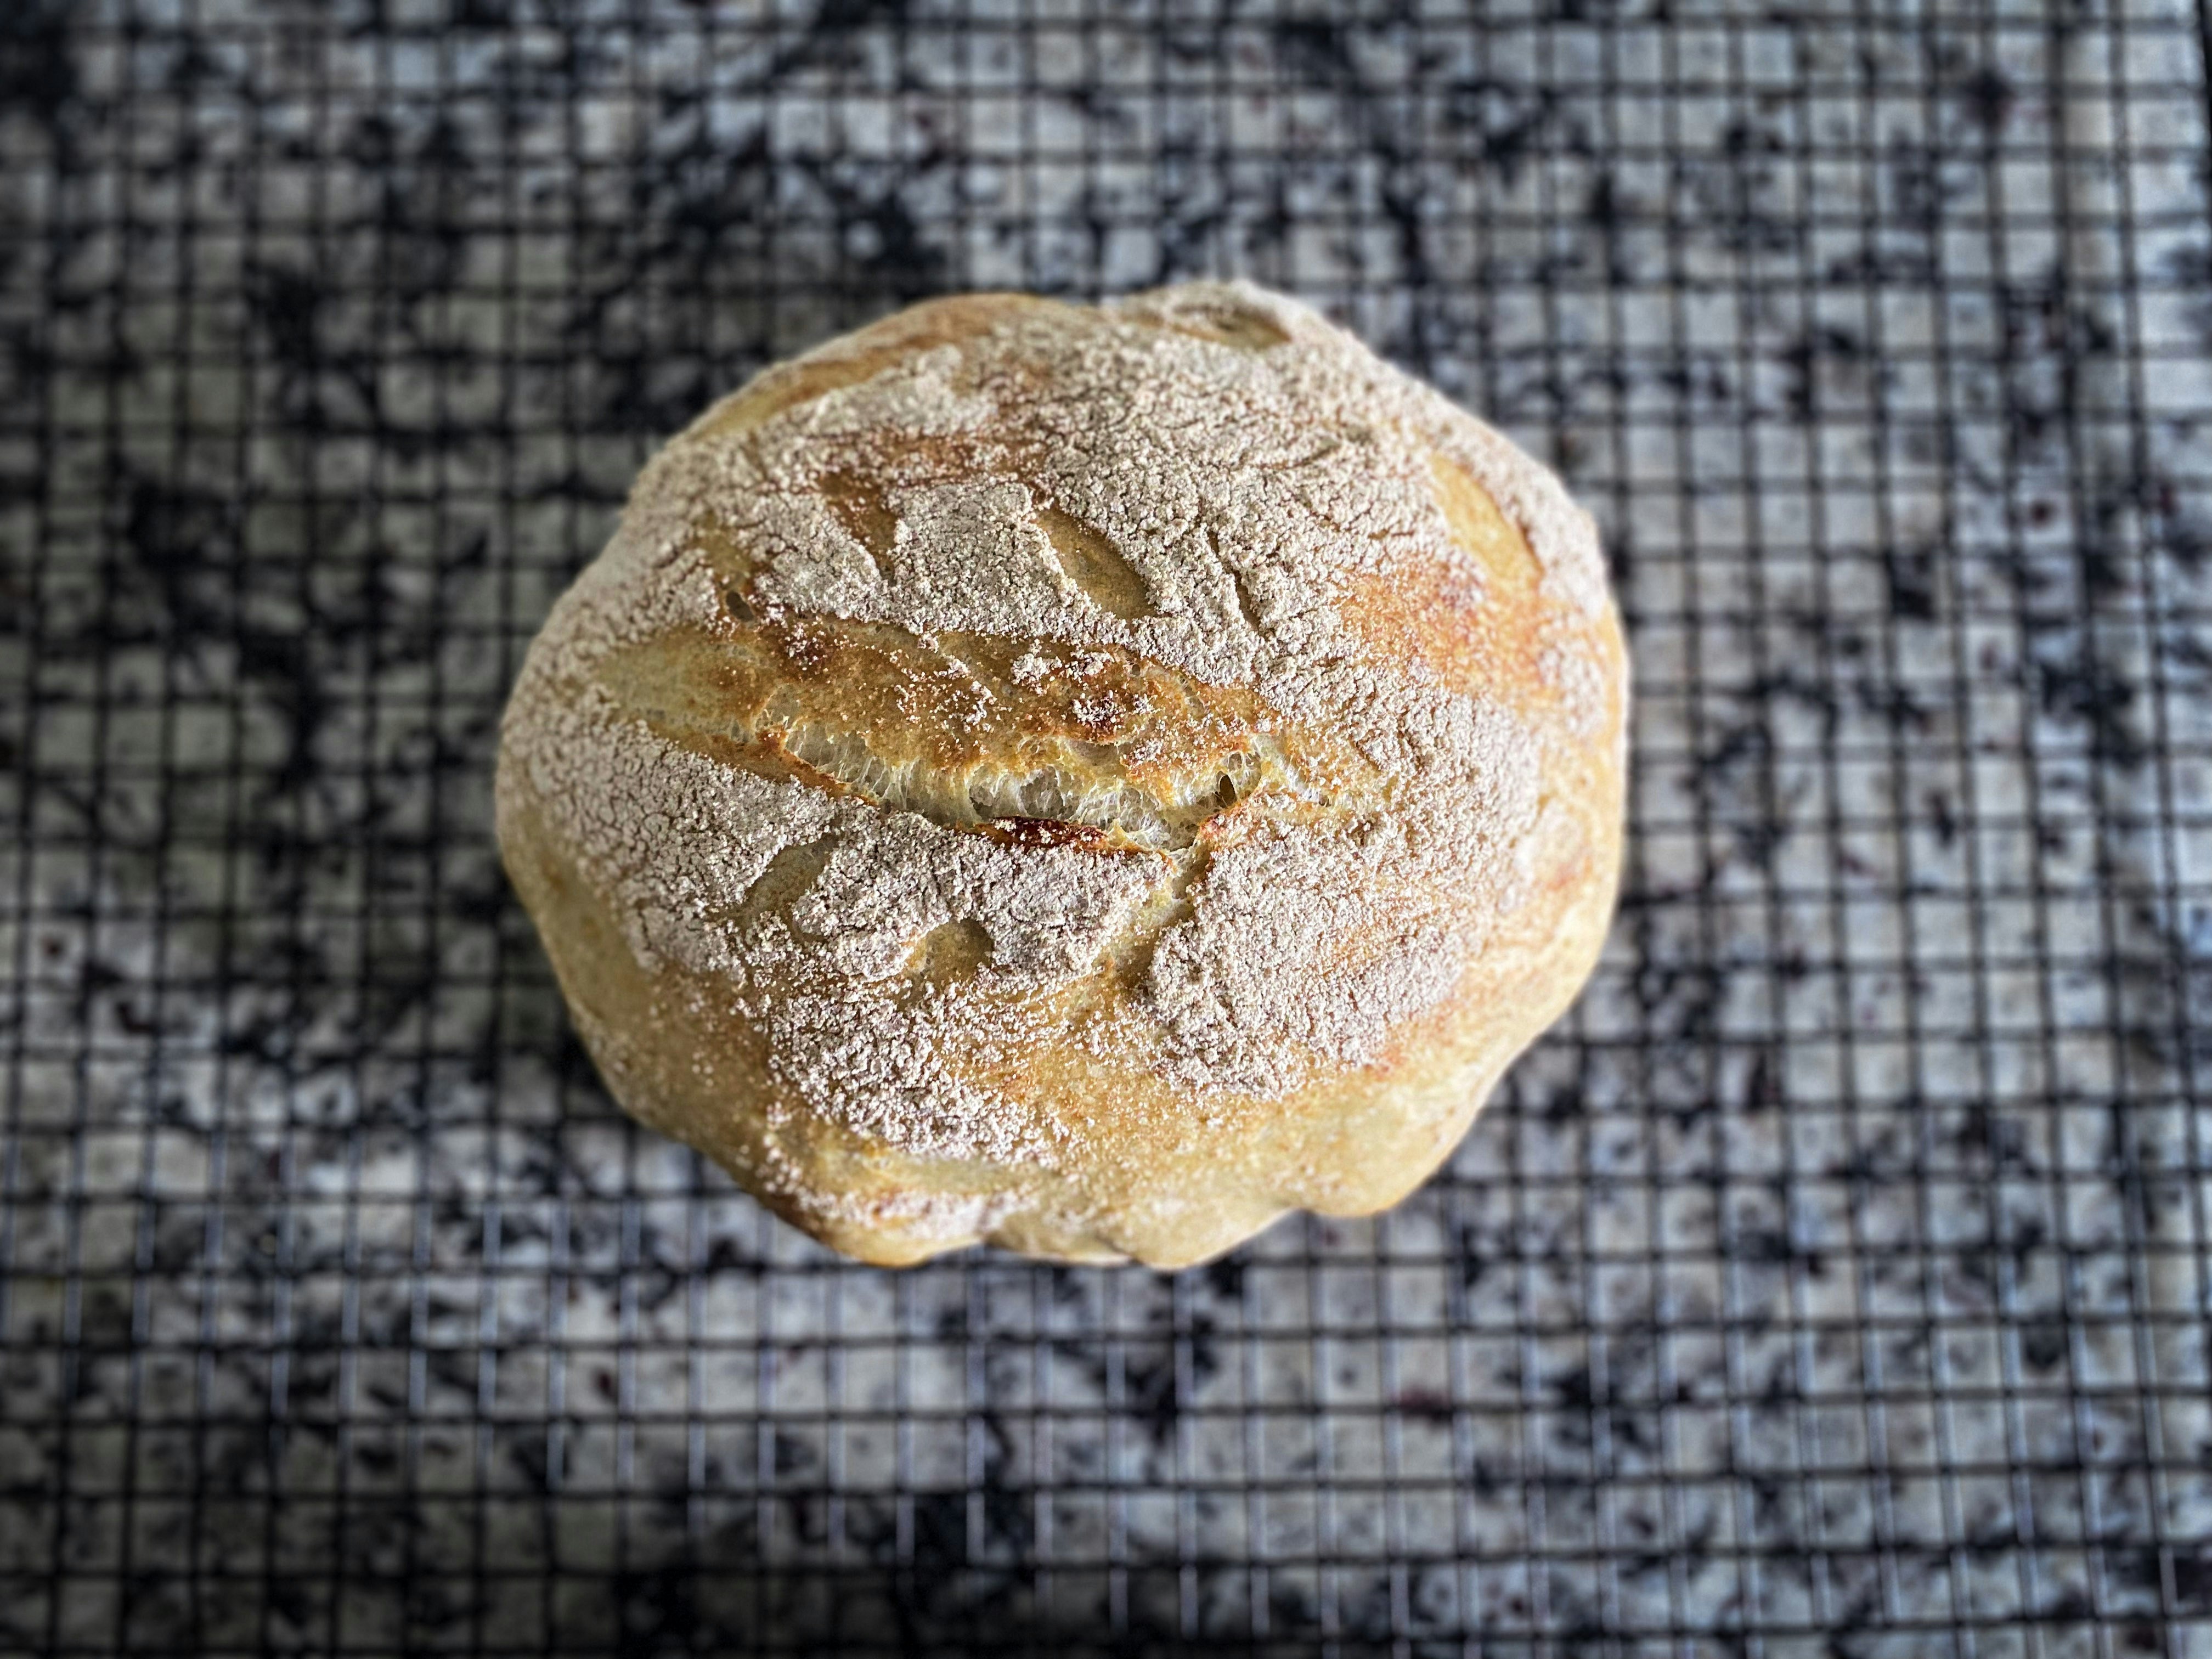
Understanding Sourdough: A Beginner’s Guide
Sourdough bread holds a unique place in the world of baking, differentiated primarily by its use of a starter culture rather than commercial yeast. This starter, a living culture cultivated from flour and water, feeds off natural yeast and bacteria present in the environment, resulting in a distinctive flavor and texture. For beginners, creating a sourdough starter is a rewarding yet straightforward process, laying the foundation for subsequent baking endeavors.
To create your own sourdough starter, begin with equal parts of flour and water. Mix 100 grams of all-purpose flour with 100 grams of lukewarm water in a clean glass jar. Stir until combined, ensuring no dry flour remains. Cover the jar loosely with a cloth or plastic wrap, allowing air to circulate while protecting it from contaminants. Let this mixture sit at room temperature for 24 hours. After the initial day, discard half of the starter and feed it with another 100 grams of flour and 100 grams of water daily. This feeding process encourages the growth of the wild yeast and bacteria essential for fermentation.
Once your starter becomes bubbly and doubles in volume within a few hours of feeding, it is ready for baking. A simple sourdough bread recipe involves mixing 500 grams of all-purpose flour, 350 grams of water, 100 grams of your active sourdough starter, and 10 grams of salt. Combine these ingredients to create a shaggy dough, then allow it to rest for 30 minutes. Next, knead the dough for about 10 minutes until smooth and elastic, then place it in a greased bowl to rise for 4-8 hours, depending on room temperature.
Visual cues are crucial throughout the fermentation process; look for the dough to roughly double in size. Pre-shape the risen dough, let it rest, and then shape it into your desired form. Finally, allow it a second rise before baking in a preheated oven. The methods involved in sourdough baking provide a connection to the age-old traditions of bread-making, producing a wholesome loaf that conveys care and creativity.
Step-by-Step Sourdough Recipe
Sourdough bread is a delightful and rewarding baking project, especially for beginners who want to immerse themselves in the world of homemade bread. This step-by-step guide will take you through the entire process, from preparing your sourdough starter to baking a beautiful loaf.
Before you begin, gather the following ingredients:
| Ingredient | Amount |
|---|---|
| Sourdough starter | 100 grams |
| All-purpose flour | 500 grams |
| Water | 350 grams |
| Salt | 10 grams |
To start, refresh your sourdough starter by feeding it with equal parts flour and water. Allow it to bubble and grow for about 4-6 hours. This will ensure you have an active starter for your dough.
Once your starter is ready, combine it with water in a large mixing bowl. Stir to dissolve. Next, gradually add the flour and salt. Mix until a rough dough forms. At this stage, it’s crucial to ensure all flour is hydrated.
Now, kneading plays an essential role in developing the gluten structure. Knead the dough on a lightly floured surface for about 10-15 minutes until it becomes smooth and elastic. Alternatively, you can use the stretch-and-fold technique every 30 minutes during the bulk fermentation process, which usually lasts around 4-5 hours, depending on room temperature.
After bulk fermentation, shape your dough into a round loaf. Allow it to proof in a well-floured banneton for 1-2 hours. During this time, a carefully controlled environment helps enhance the flavor and texture of your bread.
Finally, preheat your oven to 450°F (232°C), and once your dough has proofed, score the surface with a sharp knife. Bake the bread for 30-40 minutes until golden brown and hollow sounding when tapped. Let it cool before slicing to allow the crumb structure to set properly.
By following these detailed steps, you’ll find the process of making sourdough bread approachable and enjoyable. Not only will you have a delicious loaf to share, but you will also gain valuable skills in bread-making.
Exploring Flatbreads: Quick and Easy Recipes
Flatbreads are versatile and simple bread options that can be made quickly with minimal ingredients, making them ideal for beginners. These delightful staples can be paired with a variety of dishes or enjoyed on their own. In this section, we will explore three popular types of flatbreads: naan, pita, and tortilla. Each recipe emphasizes straightforward steps designed for novice bakers, ensuring that anyone can produce delicious homemade bread.
Naan
Naan is a traditional Indian unleavened flatbread that is soft and fluffy. To make naan, you will require the following ingredients:
- 2 cups all-purpose flour
- 1 teaspoon salt
- 1 teaspoon baking powder
- 3/4 cup water
- 1 tablespoon yogurt (optional, for added softness)
- 1 tablespoon olive oil
To prepare naan, mix the dry ingredients in a bowl, then gradually add the water and yogurt. Knead the dough until it is smooth, then let it rest for at least 30 minutes. Roll the dough into flat rounds and cook them on a hot skillet for about 2-3 minutes on each side until golden brown.
Pita
Pita bread is another easy-to-make flatbread that puffs up while cooking, creating a pocket that can be filled with various fillings. For basic pita, the following ingredients are required:
- 2 cups whole wheat flour
- 1 teaspoon salt
- 1 teaspoon sugar
- 1 tablespoon olive oil
- 3/4 cup warm water
- 1 teaspoon active dry yeast
Begin by mixing the yeast with warm water and sugar, allowing it to proof for about 5 minutes. In a separate bowl, combine flour and salt, then mix in the yeast mixture and olive oil. Knead until smooth, and let rise for about an hour. Shape the dough into rounds and bake at 450°F (230°C) for 5-7 minutes, watching for them to puff up.
Tortilla
Tortillas are a staple in many cuisines, especially in Mexican and Central American cooking. They are also simple to whip up with only a few ingredients, such as:
- 2 cups all-purpose flour
- 1/2 teaspoon salt
- 1/2 cup water
- 3 tablespoons vegetable oil
To make tortillas, combine the flour and salt in a bowl, then gradually add the water and oil. Mix until a dough forms, then knead slightly. Divide the dough into balls, roll it out, and cook each tortilla on a hot skillet for about 30 seconds on each side. These tortillas can be used for wraps, tacos, or served alongside your favorite meals.
Flatbreads, from naan to pita and tortilla, are not only gratifying to make but also enhance a variety of dishes. Their simplicity and versatility encourage novice bakers to experiment and enjoy the experience of creating warm, homemade bread.
Tips for Successful Bread Baking
Baking bread can be an enjoyable and rewarding experience, especially for beginners. To ensure the best results, there are several essential tips that can enhance your baking process. One of the most crucial aspects of successful bread making is measuring ingredients accurately. Using weight measurements rather than volume can greatly improve the consistency of your dough. Investing in a kitchen scale can help achieve precise measurements, ultimately leading to better texture and flavor in your homemade loaves.
Understanding dough hydration levels also plays a significant role in bread baking. The hydration level, which refers to the ratio of water to flour in your recipe, can dramatically affect the dough’s handling characteristics and the final texture of the bread. A higher hydration level typically results in a chewier crumb and a more open crumb structure. However, it may also make the dough stickier and more difficult to work with. Beginners should start with lower hydration levels and gradually experiment to find the ideal balance according to their skill level.
Moreover, it is essential to consider environmental factors such as humidity and temperature when baking. High humidity can cause dough to gain moisture and may require adjustments in flour measurements, while dry conditions may necessitate a little extra water. Pay attention to the dough’s texture during kneading; the goal is to achieve a smooth, elastic consistency. Additionally, allow your dough adequate time to rise, as this fermentation process is vital for developing flavor and structure.
Common pitfalls such as over-kneading, under-proofing, or forgetting to preheat the oven can hinder your baking success. Recognizing these areas and making necessary adjustments will help build your confidence in the kitchen. Remember, baking is an art that improves with practice. Do not hesitate to experiment and trust your instincts to achieve the perfect loaf of bread.
Troubleshooting Common Bread Baking Issues
Baking bread can sometimes present challenges, particularly for beginners who may encounter a variety of issues. One of the most commonly faced problems is bread that does not rise properly. This can be due to inactive yeast, which can happen if the yeast expires or is not activated correctly. To remedy this, always check the expiration date of your yeast and ensure that you proof it in warm water with a little sugar for about 5 to 10 minutes until it becomes frothy. This step allows you to confirm the yeast is active before incorporating it into your dough.
Another common issue is dense bread, which can arise from various factors such as insufficient kneading, using too much flour, or not allowing adequate rising time. To prevent dense loaves, ensure you follow the ingredient measurements accurately and use the ‘spoon and level’ method when measuring flour to avoid packing it into the measuring cup. Additionally, kneading the dough thoroughly enhances gluten development, which is crucial for a light and airy texture. If time allows, consider extending the second rise, as this additional rest assists in achieving a more open crumb structure.
Uneven texture is another issue that bakers may experience, often due to improper shaping or insufficient proofing. Ensuring that the dough is shaped uniformly can facilitate an even bake. To achieve this, divide the dough into equal portions and shape them consistently. Make a habit of allowing the dough to proof until it has roughly doubled in size; this will contribute significantly to an even texture throughout the loaf.
By addressing these common bread baking issues and employing effective solutions, beginner bakers can build their confidence in the kitchen. Experimenting and understanding the causes of these challenges will ultimately lead to more successful and satisfying baking experiences.
Storing and Enjoying Your Homemade Bread
After you have invested time and effort into creating your homemade bread, the next pivotal step is ensuring its proper storage to maintain freshness. Once your bread has finished baking, it is important to allow it to cool completely on a wire rack. This prevents moisture accumulation, which can lead to a soggy crust. For most types of bread, cooling usually takes about one to two hours.
Once cooled, slicing your bread should be done with a serrated knife to achieve clean, even slices. If you plan to consume the bread within a few days, storing it at room temperature in a bread box or wrapped in a clean kitchen towel is advisable. For enriched breads, such as brioche or sweet rolls, a plastic bag can be used to retain moisture, which aids in keeping them soft.
For longer storage, freezing is an excellent option. To do this, wrap the completely cooled loaf tightly in plastic wrap and then in aluminum foil or place it in a freezer-safe bag. This two-layer protection helps prevent freezer burn and maintain quality. Typically, homemade bread can be stored in the freezer for up to three months. When you’re ready to enjoy your bread, simply remove it from the freezer and let it thaw at room temperature or in a preheated oven for a few minutes, reviving its texture.
When it comes to enjoying your homemade creations, the possibilities are abundant. Pair warm slices with butter or olive oil for a simple yet satisfying experience. Additionally, consider using your bread as a base for a delicious sandwich or toast topped with avocados, spreads, or fresh herbs. Experimenting with various toppings or meals that compliment the unique flavors of your bread will enhance your tasting experience and elevate your culinary endeavors.
Conclusion: Your Bread Baking Journey Begins
As we reach the end of this guide on easy homemade bread recipes for beginners, it is time to reflect on the journey you are about to embark upon—one filled with creativity, flavor, and satisfaction. The act of baking bread is not merely a culinary task; it is an art form that taps into the comfort of home cooking and the joy of creating something tangible and nourishing. Throughout this blog post, we have explored a variety of recipes, ranging from simple white loaves to hearty whole grain and artisan options, each providing a unique opportunity to refine your skills.
The beauty of bread baking lies in its accessibility. With just a few basic ingredients and a little time, you can produce bricks of crusty goodness that can fill your home with an irresistible aroma. Baking bread is not only about following recipes but also about exploring your own variations and personal touches. As you practice these techniques, remember that each loaf is a reflection of your efforts and dedication. Don’t shy away from making mistakes; they are often the best teachers.
We encourage you to share your own bread-baking experiences, whether they be triumphs or challenges. Photographs of your creations can inspire others, fostering a sense of community among fellow enthusiasts. Engage with your friends or join online groups focused on homemade bread, where you can swap tips, ask questions, and celebrate your culinary achievements together. Ultimately, the real reward lies in the process and the bonds created over a fresh slice of bread. So, gather your ingredients and start kneading—your journey into the world of baking awaits!


Add comment